Papad making in East Africa
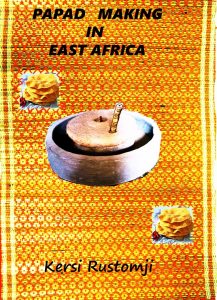 The cover depicts a highly ornate African mkeka, mat, made by the African women from raffia cut from the bush around their villages, of mud and thatched huts.
Such mkeka were very common in many Indian homes. These were used in an open court or in a garden space, where many chores and a variety of food preparations were made. Ladies also spent their time on it to breast feed babies, or socialize with their lady friends from the neighbourhood.
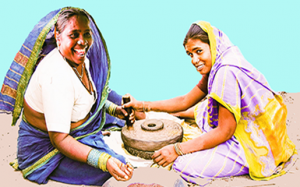
An Indian hand turned stone mill, a chakki, or a ghanti, to make flour sits in the centre. Local Indian traders imported these from India. Fried papads sit at the left top and right bottom of the ghanti.
Cover graphic © Kersi Rustomji. 2020
Content and all graphics © Kersi Rustomji 2020, unless otherwise indicated.
Revised 2020
PAPAD MAKING IN EAST AFRICA
Kersi Rustomji
The ladies of the Indian families in early East Africa were very resourceful and highly supportive of each other within their neighbourhood and among families and friends.
When a large culinary item had to be prepared, the ladies gathered at the home of their lady friend, who needed it done, and pitched in to help one another.
Among a few such events, was to replenish the depleting stocks of variety of daals, rice, lentils, mung, and chickpeas, which needed winnowing and removing of the grit; or making achaar, pickles, pappadums, and grinding various grain to make flour. Packaged flour was not available then.
Unlike these days readymade pappadams in packets too were not available at local food stores and supermarkets. These were hand made at home and it was not an easy task. Several processes were needed to obtain the paper thin deliciously flavoured pappadum.
When Urmilaben, Shariffa, Bhadra, Fatima, Kanchan, or Khatibai, needed their pappadams restocked, an age old chain of cooperative events commenced.
Generally first, the husband was cornered and told, ‘Aare papad banaw wana che, toh jara, Jivrajbhai ne badhi wastuo maate, khaber moklawjo; hu badhu lewa jawani choo.’ ‘Aare, need to make papads, so please advise Jivrajbhai about all the stuff; I will be going to get it all.’
A day or two later Urmilaben, Shariffa, Bhadra, Fatima, Kanchan, or Khatibai, visited Jivrajbhai the grocer, and first checked all the ingredients needed, while querying the prices and even complaining, ‘Soo, udad ni daal atli monghi thai gayi che!’ ‘What, udad daal has become so dear!’
To which, Jivrajbhai would comfort her with, ‘Haa, pan fiker nahi karo; tamne saro bhaw kari aapish.’ ‘Yes, but don’t worry; I’ll make a good price for you.’
The lady selected, udad, mung daals, or rice, depending on the type of pappadum to be made. Then chose the required spices, oil, and ordered the quantity, which was delivered to the home. Having done the first in the chain of process, the lady then sought her neighbours.
Later she visited her friends and neighbours, and requested their assistance in the further processes involved.
‘Aare papad noh lott khandwano che, toh somware jara ghare awjo.’ ‘Aare, have to grind flour for papad, so please come home on Monday.’
On the day the husbands and fathers were warned, ‘Bapore jamwa jaldi awjo, aaje ghanu kaam che; papad banaw wana che.’ Come early for lunch, there is much work today; have to make papad.’ An early and a simple lunch was their meal for the day.
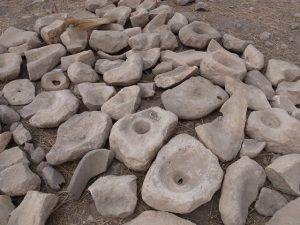
For the purpose of pounding or grinding the daals, many households had, a large wooden, kinu pestle and mchi mortar, made by the local African wood carvers, or a hand operated Indian stone mill, a ghanti, imported from India.
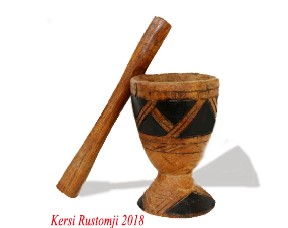 A decorated hand made African wooden kinu a mortar and a mchi a pestle.
 An enamel basin on a mkeka for collecting the pounded flour.
Generally the house help engaged by the family did the pounding of the daals. The wooden mortar stood beside a mkeka, an African woven raffia mat. An enamel or a metal basin, sat on it to place the flour in. The pounding took some hours and needed some breaks for a small rest.
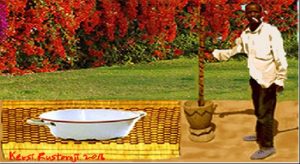 Mwangi the house help engaged by the family did the pounding of the daals. Note the bougainvillea fence common in many homes.
The lady of the house kept a sharp eye on Mwangi and badgered the poor man as he took a break from the hard work for a smoke.
‘Aare Mwangi; namna ngani, wewe simama, simama, na futa sigara. Hapana taka hiwi. Ponda, ponda, kila mara.’
‘Aare Mwangi; what, you are standing, standing, and smoking cigarette. Don’t want like this. Pound, pound, all the time.’
A smiling Mwangi replied, ‘Kazi ngumu, mama,’ ‘Hard work, mama,’ and the pounding resumed.
Mama, mother, was the Swahili word used by the Africans in East Africa, to address all the women.
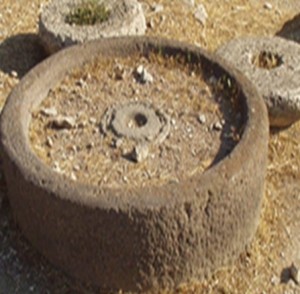
If a ghanti or chakki, the stone mill was used, it too sat on a mkeka with a basin.
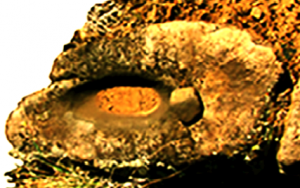
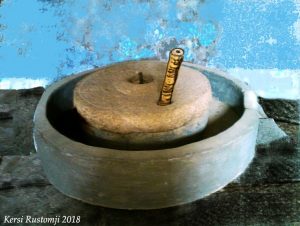 An India stone ghanti imported from India with a flour collecting slot in the well.
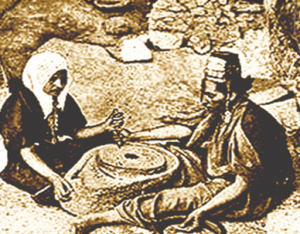
In the Indian chakki or ghanti, a hand turned stone mill for making flour, the grain placed in the hole in the middle of the top stone wheel, then turned by the wooden handle. The grains crushed against the stationary bottom wheel, turned into flour. The flour collected in the surrounding well, then swept out through a closed slot seen on the rim at the right of the handle, then swept in a collecting bowl.
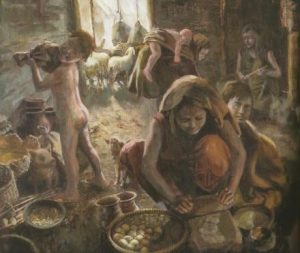
Two ladies seated at the wheel opposite each other did this grinding process. From the container of grain at hand, a fistful was dropped in the upper stone hole, then the lady gave it spin, which was then continued by the partner opposite her. This division of labour lessened the strain on their arms.
 Women grinding at a stone chakki. Computer graphic created from free images domain. © Kersi Rustomji.
A day or two after receiving all the ingredients, the making of the dough commenced. Again the neighbouring ladies arrived, to add the required salt, spices, and oil to the flour, after which they began to knead in small sizes, which were then combined to make a large dough ball.
The large ball was beaten with a rolling pin or even with an iron pestle, to evenly spread all the ingredients in the tough dough. This kneading continued till the dough became sufficiently supple and malleable. It was then left on a platter overnight, covered with a thin cotton cloth to mature it further, though this was not always needed. After this, the dough was ready for rolling into pappadams.
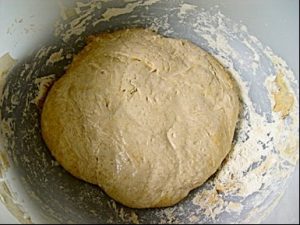 Dough ready for rolling into papadums
Young daughters were also invited to join in all the processing, to learn and acquire these skills, thus continuing a cultural heritage. This also prepared them for their married life.
When the ladies arrived the next day, each with her velan and patlo, rolling pins and boards, the dough platter lay ready on a mat. A sadlo, a plain cotton sari, also sat on the mat, over a hard piece. Each lady broke a large piece of dough, which they first hand rolled into a thick long piece.
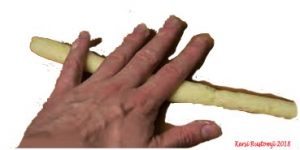 A lump from the dough hand rolled into long thin piece.
Using a string, the long thin piece was cut into small pieces, though mostly these were just broken off, and formed into lua, rough balls. The young girls, rolled the luas into small flat round thickish tikkis, about the size of a round biscuit.
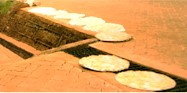
Then the more experienced ladies used their rolling pins and boards, to roll out the tikkis into thin pappadams. These then were placed on the sadlo on the hard surface, to cure and dry for a day or two. The pappadams were turned over regularly, to prevent the edges curling.
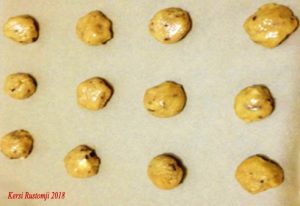 Luas made from the pieces cut or broken off from the long rolled dough.
 Girls helped to press luas into flat tikkis.
 The tikkis were then rolled into thin pappadums by the more experienced ladies.
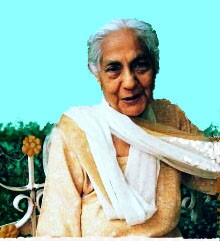
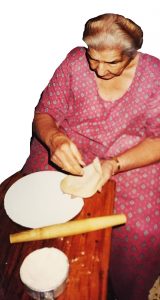 Shariffa Keshavjee’s mother Khatibai rolling papad.
Photo: Shariffa Keshavjee.
Computer enhancement: Kersi Rustomji
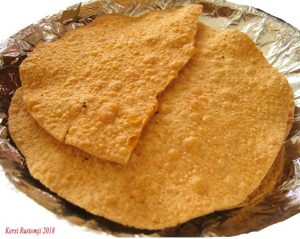
 Paper thin pappadams made by Shariffa Keshavjee’s mother Khatibai, laid out to dry prior to storing in a tin.
Photo: Shariffa Keshavjee.
The children and family ladies kept an eye on the drying pappadams, to protect these from the birds or strong wind.
When sufficiently dried and ready, the pappadams placed carefully in a round tin with a lid, were kept in a storeroom, from which to access for frying or roasting.
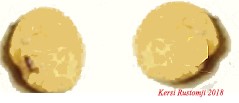
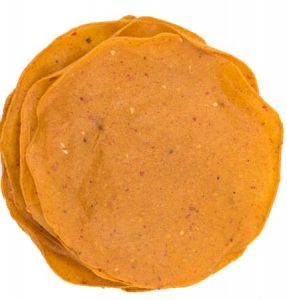 Dried pappadums ready for storage.
Graphic: Kersi Rustomji 2018
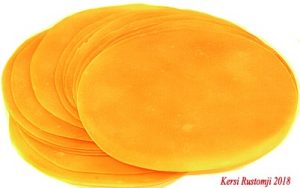
 End of the ladies’ assembly line yummy pappadams.
Henry Ford, eat your heart out. Assembly line began in old India ages before your time.
 Urmila Jhaveri
 Kanchan Shah
 Shariffa Keshavjee
 Bhadra Vadgama
My thanks to Urmila Jhaveri, Bhadra Vadgama, and Shariffa Keshavjee, Kanchan Shah, for their assistance to educate me, to fill in gaps in my papad making processes knowledge.
ANCIENT GRINDING STONES
30 000 years ago
While poppadum are a unique element of the Indian cuisine, the use of grinding stones has been worldwide, and goes back as far as 30,000 years. A variety of grinding stones were used by different people all over the globe. These stones were used to grind grains and seeds, and dried roots, to obtain flour. Most of the flour was made into thick flat bread or made into dough to bake over a fire or covered over with very hot ash and coals.
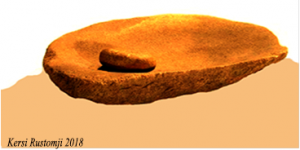 Ancient Australian Aboriginal grinding stone platform and a muller, the thin roller like stone to crush the seeds with, from Cuddie Springs, in New South Wales, dated 30,000 years old. Photo created from: Free public domain.
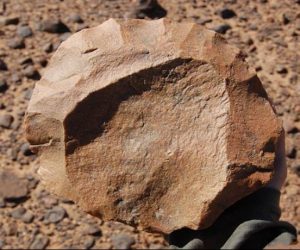
This grinding stone is indicative of grinding stones used in the region of Australia for thousands of years. Fragments of grinding stones dating back 30,000 years in the Pleistocene Epoch, have been found at the archaeological site at Cuddie Springs in western region of the state of New South Wales, Australia.
It is an Aboriginal grinding stone with a long round stone, or muller, to grind with. The grinding stone is 40 cm long and 35 cm wide with a height of 10 cm and is made from sandstone, which has a rough surface for grinding. The top stone is made from a hard smooth river cobble. This artefact was collected from Marra Station on the Darling River and donated to the Australian Museum prior to 1941. (Australian Museum free information domain.)
Grinding stones used to grind seeds and nuts have been found throughout Australia, particularly in arid and semi-arid areas. Indigenous people dependent on grass seed for starch as their staple food utilized such appliances. In some areas of Australia grinding utensils were made from heavy hardwoods.
The use of grinding stones, to process food, precedes the development of cultivating. People who were hunter-gatherers, and those that had a sedentary lifestyle, began to develop traditional food grinding devices. The grinding stone and top stone, muller, were used by the Australian indigenous Aboriginal women in the semi-arid region of the State of New South Wales to grind seeds from grasses, trees, shrubs, succulents, and ferns, to make flour for cooking purposes.
The flour produced was mixed with water and eaten as a paste, or cooked in the coals of a camp fire, and eaten as flat cakes, and were also made into loaves, possibly used with meals prepared with other local ingredients.
A grinding stone made of basalt found on the ancient site of Abu-Hureyra in Syria dates to about 11, 200 years before present. The Ohalo II site in the Sea of Galilee in Israel produced a basalt grinding stone that dates to 23,000 years ago.
All above information sourced from free to public domain, unless indicated otherwise.
 11,000 years old grinding stone found in Messak Settafeh in Saharan Libya. Photo: Free public domain.
 Israeli couple use a grinding stone. Photo: Free public domain.
 Another site, in southern Japan at Nishitaragasako, produced grinding stones that date back to some 29,000 years.
Grinding stones from Nishitaragasako site in Japan.
Photo: Free public domain.
The indigenous American people who cultivated various seeds and corn, also developed grinding and crushing implements that predate the arrival of the white settlers to these lands.
 American Pueblo Indian grinding stone.
Photo: Free public domain
 Grinding stone in the kitchen of American Navaho Indian.
Photo: Free public domain.
 Ancient Greek grinding wheels.
Photo: Free public domain.
 Neolithic period family lady using a grindingstone.
Photo: Free public domain

Ancient Japanese family lady using a pounding stone on right.
Photo: Free public domain.
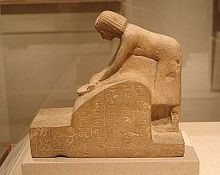 Senenu Grinding Grain, Egypt ca. 1352-1336 B.C.
Photo: Brooklyn Museum
RECIPE FOR PAPPADUM
This recipe is for the modern day, not requiring grain pounding to make flour, nor hand making the dough; needs only kneading by hand.
Pappadams are delicious, spicy Indian crackers that traditionally require many ingredients and can even take days to make. They are prepared ahead in quantity and deep fried, or roasted in microwave oven, just before serving. This is a simplified version. It still requires time, but the results are worth it.
Ingredients:
2 cups udad or rice flour
1 teaspoon cracked/coarsely ground black pepper
1 teaspoon ground cumin
½ teaspoon papad khar; this should be calculated and used at ¼ teaspoon per 1 cup flour.
1⁄2 teaspoon salt
1 clove garlic, pressed
1 to 2 pinch of asafoetida optional
1⁄4 cup water
1 tablespoon water
Cayenne or ground red chilli for dusting tops
Oil, for frying optional; not needed if roasting.
Directions:
Add to the flour, ground black pepper, ground cumin, papad khar, asafoetida and salt in a large bowl or in the food processor; mix thoroughly until all the ingredients are evenly distributed.
Add the garlic and again mix well.
Add enough of the water to form a dough that will hold together in a cohesive ball; if necessary, add up to 1 additional tablespoon water.
The dough should be fairly stiff and damp; if it is too wet, it will not roll well.
Knead the dough for about five minutes by hand or pulse for about fifteen seconds in the food processor; the dough should be smooth.
With your hands, shape the dough into a cylinder or a log, about 2 inches thick and 6 inches long.
With a sharp knife, cut the cylinder into 1/2-inch thick slices, and hand mould into balls.
The next step uses oil, so do not use your pastry cloth and rolling pin sleeve.
Place each ball on a lightly oiled surface or a rolling board. An upside-down metal pot makes a good rolling board.
Lightly oil the ball and then roll out into a very thin circle about 6 or 7 inches in diameter.
Pappadams must be rolled extremely thin, maximum 1/16 inch thickness, or the thickness of writing paper.
If the dough sticks to your rolling pin, gently pull it off.
Dust the tops of each pappadam with cayenne pepper or red ground chilli. Optional.
Using a metal spatula to loosen the edges of the pappadam from the rolling surface, carefully place them on large baking sheets, a muslin or a cotton cloth.
The traditional method for preparing and frying pappadams is below; you can also bake them in a 300F oven until crisp and dry. Cool them on a rack. Watch these do not burn, as can happen very easily.
The cooking time may vary depending upon the thickness and moisture in the rolled dough.
To prepare the pappadom in an authentic manner, do not bake them; first allow them to dry by leaving them in the sun for a few hours; or place these in a very low oven (10F) for 1 to 2 hours checking and turning occasionally. Dry the poppadum until they are just slightly flexible and show no moisture; they should not brown or bake, however.
After this, the pappadams should be stacked flat, and stored in an airtight container until needed. These will keep for months if stored properly.
When ready to serve, heat about 1/8 inch of oil in a large skillet; the oil should be hot, but not smoking; a drop of water flicked into the skillet should sizzle immediately.
One at a time, drop the pappadams into the hot oil. Turn the pappadams when it begins to curl at the edges; it will quickly fry and become crisp. Remove it before it turns brown. Cool and drain the pappadams on paper towels and eat them immediately.
You can use the microwave oven to roast the pappadams, for a minute or two. Try it out first, to get the exact timing.
This recipe can also be used with mung bean flour. ENJOY…
Source: non-copyright www recipes.
Additional information and editing Kersi Rustomji.
Also, see: www.indianrecipevideo.com
JAI BABA JAI SWAMI